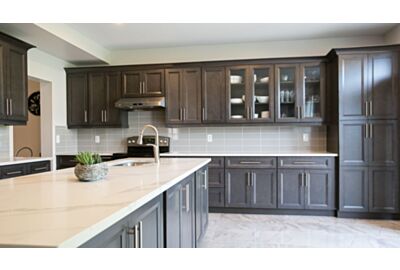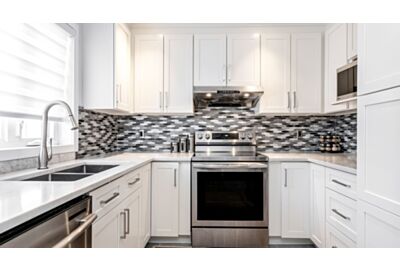
Installing Ready-to-Assemble (RTA) cabinets is one of the most cost-effective ways to upgrade a kitchen, bathroom, laundry room, or office. Homeowners love RTA cabinets because they offer the perfect balance of affordability, customization, and easy DIY installation. But even though RTA cabinets are designed to be beginner-friendly, there are still common mistakes that can ruin the final result—or even damage the cabinets during assembly.
Whether you’re a DIY enthusiast or a first-time installer, understanding what to avoid can save you time, money, and frustration. In this guide, we’ll walk through the top mistakes people make when installing RTA cabinets, and exactly how you can avoid them for a flawless finish.
Why Avoiding These Mistakes Matters
RTA cabinets are engineered with precision. Misalignments of even ⅛ of an inch, skipped steps, or the wrong hardware can cause structural weakness, gaps, crooked doors, or long-term durability problems. Prevention is always easier than repair.
Avoiding installation mistakes helps ensure:
-
Your cabinets last for 10+ years
-
Doors and drawers operate smoothly
-
You maintain manufacturer warranties
-
The final look appears truly professional
-
Your kitchen layout remains functional and safe
Let’s dive into the most common pitfalls—and how to steer clear of them.
1. Not Reviewing the Complete Layout Before Starting
Many homeowners open the first box, start assembling one cabinet, and then realize halfway through that the layout doesn’t work.
Why This Is a Problem
An RTA cabinet layout is a puzzle. Once one piece is out of place, the rest can’t align correctly. For kitchens, even small shifts can impact appliances, electrical outlets, and plumbing.
How to Avoid It
-
Review your kitchen design, measurements, and cabinet list before opening any boxes.
-
Compare the order list with the actual SKU labels on the boxes.
-
Lay out the cabinets in the room to visualize the final placement.
-
Check appliance and sink dimensions to ensure proper fit.
Pro Tip:
Print your layout and tape the cabinet numbers directly onto the wall where they will be installed.
2. Not Checking All Boxes for Damage Before Assembly
One of the biggest mistakes DIY installers make is opening only the first box and assuming everything else is fine.
Why This Is a Problem
If a part is damaged, missing, or incorrect, you may not notice until mid-installation. That can delay your project for days or weeks.
How to Avoid It
-
Inspect every box upon delivery.
-
Look for dents, crushed corners, or moisture damage.
-
Open boxes carefully and check each panel.
-
Report issues to the supplier immediately—before assembling anything.
Most reputable RTA cabinet companies will replace damaged parts for free, but only if the issue is reported early.
3. Using the Wrong Tools or Hardware
Some installers try to assemble cabinets with whatever tools they have on hand, but using the wrong tools can strip screws, damage wood, or cause misalignment.
Recommended Tools
-
Drill with adjustable torque
-
Rubber mallet
-
Level (24–48 inch)
-
Clamps
-
Measuring tape
-
Square
-
Stud finder
-
Screwdrivers
-
Wood glue (if recommended by the manufacturer)
Common Mistakes to Avoid
-
Over-tightening screws → causes cracks
-
Using power tools at full speed → strips hardware
-
Hammering wood directly → chips or dents panels
Pro Tip:
Always start screws by hand, then finish with a drill set to a low torque level.
4. Ignoring the Manufacturer’s Instructions
Every RTA cabinet brand is slightly different. Even if you’ve assembled similar cabinets before, small differences in hardware, construction style, or fasteners matter.
Why This Is a Problem
Skipping instructions can cause:
-
Loose joints
-
Reduced weight capacity
-
Poor alignment
-
Voided warranty
How to Avoid It
-
Read the entire instruction booklet before starting.
-
Watch the manufacturer’s videos if available.
-
Follow the exact order of steps.
Proper assembly ensures durability and professional results.
5. Forgetting to Level the Base Cabinets
Leveling is one of the most important steps—and also the most commonly overlooked.
Why It Matters
If the base cabinets aren’t perfectly level:
-
Countertops won’t sit properly
-
Seams and doors will be uneven
-
Drawers will roll open or closed unintentionally
-
Wall cabinets may not align with base cabinets
How to Avoid It
-
Use a long level (not a small one).
-
Shim cabinets as needed—but never over-shim.
-
Start installing from the highest point of the floor.
Pro Tip:
Always level base cabinets before fastening them to the wall or each other.
6. Not Securing the Cabinets to Wall Studs
RTA cabinets must be anchored into studs to support the weight of dishes, cookware, or countertops.
Common Mistakes
-
Screwing only into drywall
-
Using the wrong screws
-
Not hitting enough studs
-
Fastening cabinets before leveling
What to Do Instead
-
Locate studs with a stud finder.
-
Use cabinet mounting screws (2.5–3 inches).
-
Ensure every cabinet is anchored into at least two studs.
-
Fasten cabinets to each other first, then to the wall.
7. Assembling Cabinets in a Crowded or Messy Space
RTA cabinets need a clean, flat working surface. Assembling them on carpet, uneven floors, or a cluttered space can cause damage or misalignment.
How to Avoid This
-
Clear the workspace before opening any boxes.
-
Assemble cabinets on a blanket or protective mat to avoid scratches.
-
Keep hardware organized in labeled trays.
-
Leave sufficient room to rotate or flip the cabinets safely.
8. Incorrect Door and Drawer Alignment
Misaligned doors are one of the most visible signs of “DIY gone wrong.” Fortunately, it’s easy to avoid.
Why Alignment Problems Happen
-
Base cabinet not level
-
Hinges installed incorrectly
-
Drawer rails not secured evenly
-
Rushing the adjustment process
How to Avoid It
Use the three hinge adjustments typically available on soft-close hinges:
-
Side-to-side
-
Up/down
-
In/out
Make small adjustments gradually until the doors align perfectly.
9. Not Planning for Filler Pieces and Spacers
Filler pieces are crucial for a seamless professional look, especially around walls, corners, or appliances. Many homeowners forget to order or install them.
What Happens If You Skip Fillers
-
Gaps appear between the cabinet and wall
-
Doors bump into trim or appliances
-
Drawers cannot fully open
How to Avoid It
-
Identify gaps in the layout before ordering.
-
Use fillers to ensure proper spacing.
-
Measure twice before cutting fillers to size.
10. Incorrect Wall Cabinet Height Installation
Wall cabinets must be installed at the right height for ergonomics, appliance clearance, and aesthetics.
Common Mistakes
-
Mounting too high or too low
-
Not aligning with base cabinets
-
Forgetting about hood vent height requirements
Standard Guidelines
-
Wall cabinets typically start 18 inches above the countertop.
-
Bottom of wall cabinets should be approx. 54 inches from the floor.
If you're installing over appliances (such as a microwave), follow the manufacturer’s clearance requirements.
11. Forgetting to Pre-Drill Holes
Pre-drilling prevents cracks and keeps surfaces smooth.
Why People Skip It
-
They think the screws will go in easily
-
They’re trying to speed up the job
-
They’re not aware it’s necessary
How to Avoid Damage
-
Always pre-drill near edges
-
Pre-drill for drawer rails
-
Pre-drill when attaching filler pieces
Even hardwood RTA cabinets benefit from pre-drilling.
12. Not Dry-Fitting Before Final Assembly
Dry-fitting means temporarily assembling components to check alignment before applying glue or tightening screws.
Why Dry-Fit?
-
Ensures no missing parts
-
Confirms alignment
-
Helps you spot issues before final assembly
Best Practice
Assemble without glue, test the structure, then complete final tightening.
13. Overusing or Misusing Wood Glue
Some RTA cabinets require wood glue, some don’t. Many installers either use too much or avoid it altogether.
Avoid These Mistakes
-
Flooding joints with glue
-
Using the wrong type of glue
-
Applying glue where it will obstruct hardware
-
Skipping glue where it’s required for stability
Always follow the manufacturer’s instructions.
14. Installing Countertops Before Securing Cabinets
Countertops—especially quartz or stone—must never be installed before cabinets are securely fastened and level.
Risks
-
Cracked countertops
-
Sloping surfaces
-
Cabinet frame collapse
Correct Order
-
Level and secure base cabinets
-
Install panels, fillers, and toe kicks
-
Add countertop support brackets (if needed)
-
Install countertop
15. Underestimating the Time Required
A full RTA cabinet installation can take anywhere from 1–3 days, depending on skill level and kitchen size.
Common Time-Related Mistakes
-
Rushing assembly
-
Skipping leveling
-
Forgetting adjustments
-
Starting without proper planning
Give yourself enough time to do each step correctly.
Frequently Asked Questions (FAQ)
1. Are RTA cabinets hard to install?
Most RTA cabinets are designed for DIY installation, but attention to detail is essential. With proper tools and guidance, most homeowners can complete the job successfully.
2. How long does it take to install RTA cabinets?
A small kitchen may take 1–2 days. A larger or more complex kitchen may take 3–5 days, including adjustments.
3. Do I need professional help?
If you’re uncomfortable with leveling, cutting fillers, or wall mounting, hiring a professional installer can ensure a flawless finish.
4. What tools are essential for the installation?
A drill, level, stud finder, clamps, square, and screwdriver are must-haves for a high-quality installation.
5. Can I install countertops on RTA cabinets?
Yes—but only after the base cabinets are fully secured and leveled.
Final Thoughts: Achieving a Professional RTA Cabinet Installation
RTA cabinets are an excellent choice for homeowners who want premium aesthetics without the premium price tag. By avoiding the common mistakes above, you’ll ensure a smooth and successful installation that looks professional and lasts for many years.
Successful installation comes down to:
-
Good planning
-
Accurate leveling
-
Careful assembly
-
Patience and attention to detail
When done correctly, RTA cabinets can transform any space into a beautiful, functional, and long-lasting part of your home.